
There’s something magical about biting into a fresh, warm doughnut that’s crispy on the outside and fluffy on the inside. I’ve spent years perfecting my yeast doughnut technique, and today I’m sharing all my secrets so you can create bakery-quality doughnuts in your own kitchen. No more dense, oily failures – just perfect, pillowy doughnuts every single time!
The Science Behind Perfect Yeast Doughnuts
Before diving into the recipe, let’s understand what makes a truly great doughnut. The secret lies in the perfect balance between ingredients and technique. Yeast doughnuts get their distinctive airy texture from the fermentation process, where yeast consumes sugars and produces carbon dioxide, creating those beautiful air pockets.
The difference between an average doughnut and an exceptional one often comes down to:
- Proper gluten development: Enough to provide structure, but not so much that the doughnut becomes chewy
- Adequate fermentation time: Allowing the dough to develop flavor and texture
- Oil temperature control: The critical factor that determines whether your doughnut is greasy or perfectly fried
- Ingredient quality: Fresh yeast, high-quality flour, and real vanilla make a noticeable difference
I discovered these foundational principles after countless batches and early-morning experiments. Trust me when I say that understanding these elements will transform your doughnut game forever.
Essential Ingredients for Perfect Doughnuts
When it comes to yeast doughnuts, quality ingredients make all the difference. Here’s what you’ll need:
Bread flour : Provides higher protein content (12-14%) than all-purpose flour, giving your doughnuts better structure and chew. In a pinch, all-purpose flour will work, but the texture won’t be quite the same.
Active dry yeast : The leavening agent that creates those beautiful air pockets. I prefer active dry over instant yeast because it gives me more control over the fermentation process.
Whole milk : Adds richness and tenderness to the dough. The fat content matters – don’t substitute with low-fat options.
Eggs : Provide structure, richness, and help with the rising. Room temperature eggs incorporate much better than cold ones.
Unsalted butter : Adds richness and flavor. Always use unsalted so you can control the salt content precisely.
Granulated sugar : Sweetens the dough and helps feed the yeast. Don’t reduce this amount as it affects both flavor and texture.
Salt : Enhances flavor and regulates yeast activity. I use fine sea salt for even distribution.
Vanilla extract : Adds depth of flavor. Use real vanilla extract, not imitation.
Vegetable oil (for frying) : Neutral flavor with a high smoke point. I prefer a blend of vegetable and canola oils.
Perfect Yeast Doughnut Recipe
Ingredients:
For the dough:
- 4 cups (500g) bread flour
- 2¼ teaspoons (7g) active dry yeast
- ⅓ cup (67g) granulated sugar
- 2 teaspoons (12g) fine sea salt
- 3 large eggs, room temperature
- ¾ cup (180ml) whole milk, lukewarm (about 105°F/40°C)
- ¼ cup (57g) unsalted butter, softened
- 2 teaspoons (10ml) pure vanilla extract
For frying:
- 2 quarts (1.9L) vegetable oil
For the classic glaze:
- 3 cups (360g) powdered sugar
- ⅓ cup (80ml) whole milk
- 2 teaspoons (10ml) vanilla extract
- Pinch of salt
Equipment You’ll Need:
- Stand mixer with dough hook attachment
- Large mixing bowls
- Kitchen scale (highly recommended)
- Rolling pin
- Doughnut cutter (or two round cutters, different sizes)
- Candy/deep-fry thermometer
- Cooling rack
- Parchment paper
- Kitchen towels
- Spider strainer or slotted spoon
Step-by-Step Process:
- Activate the yeast: In the bowl of your stand mixer, combine lukewarm milk with 1 teaspoon of the sugar and sprinkle the yeast on top. Let it sit for 5-10 minutes until foamy and active. If it doesn’t foam, your yeast might be dead, and you’ll need to start over with fresh yeast.
- Mix the dough: Add the eggs, remaining sugar, vanilla, and half of the flour to the yeast mixture. Mix on low speed until combined. Add the softened butter in small pieces, mixing well after each addition. Gradually add the remaining flour and salt, mixing until the dough comes together.
- Knead: Increase the speed to medium-low and knead for 8-10 minutes until the dough is smooth, elastic, and pulls away from the sides of the bowl. The dough will be soft and slightly tacky but not sticky. If it’s too sticky, add a tablespoon of flour at a time.
- First rise: Transfer the dough to a lightly oiled bowl, cover with plastic wrap or a damp kitchen towel, and let rise in a warm place (about 75°F/24°C) for 1-1.5 hours, or until doubled in size.
- Roll and cut: Gently punch down the dough to release air bubbles. On a lightly floured surface, roll the dough to ½-inch thickness. Using a doughnut cutter or two round cutters (one approximately 3½ inches and one 1¼ inches), cut out the doughnuts and holes. Save the scraps to re-roll once, but avoid overworking the dough.
- Second rise: Place the cut doughnuts and holes on parchment-lined baking sheets, leaving room between each piece. Cover loosely with kitchen towels and let rise for 30-45 minutes until puffy.
- Prepare for frying: While the doughnuts are on their second rise, heat the oil in a heavy-bottomed pot or Dutch oven to 350°F (175°C). Use a candy/deep-fry thermometer to monitor the temperature.
- Fry the doughnuts: Carefully lower 2-3 doughnuts into the hot oil. Fry for 1-2 minutes per side until golden brown. Use a spider strainer or slotted spoon to turn them over and then remove them from the oil. Place on a cooling rack set over a baking sheet to drain excess oil.
- Make the glaze: While the doughnuts are cooling slightly, whisk together the glaze ingredients until smooth.
- Glaze: Dip the top of each warm (not hot) doughnut into the glaze, allowing excess to drip off, then return to the cooling rack to set.
Temperature Control: The Key to Perfect Frying
I cannot stress enough how crucial oil temperature is when frying doughnuts. This is where most home bakers go wrong, and it’s the difference between greasy, dense doughnuts and perfectly crisp, light ones.
| Oil Temperature | Result | How to Identify | How to Fix |
|---|---|---|---|
| Too low (below 340°F/170°C) | Doughnuts absorb excess oil, resulting in greasy, heavy texture | Doughnuts take longer than 2 minutes per side to brown; doughnuts appear oily | Increase heat gradually; wait until oil returns to proper temperature before frying next batch |
| Perfect (350°F/175°C) | Golden exterior, fluffy interior, minimal oil absorption | Doughnuts brown in 1-2 minutes per side; bubbles around doughnut are medium-sized | Maintain this temperature by adjusting heat as needed |
| Too high (above 360°F/182°C) | Exterior browns too quickly while interior remains undercooked | Doughnuts brown in less than 1 minute; bubbles around doughnut are large and violent | Remove pot from heat briefly; reduce heat and wait for temperature to drop |
I always fry a test doughnut (usually a doughnut hole) to check if my oil is at the right temperature. This small step has saved countless batches from disaster.
Remember: The oil temperature will drop when you add doughnuts, so adjust your heat accordingly to maintain that perfect 350°F.
Troubleshooting Common Doughnut Problems
Even experienced bakers encounter issues when making doughnuts. Here’s how to solve the most common problems:
| Problem | Possible Causes | Solution |
|---|---|---|
| Dense, heavy doughnuts | Underproofed dough; over-kneaded dough; oil temperature too low | Allow for proper rising time; knead just until dough is smooth and elastic; maintain correct oil temperature |
| Doughnuts collapse after frying | Overproofed dough; dough too warm when fried | Don’t let dough rise too long; if kitchen is very warm, reduce second rise time |
| Doughnuts too oily | Oil temperature too low; improper draining | Use thermometer to maintain 350°F; drain on cooling rack, not paper towels |
| Doughnuts too pale | Oil not hot enough; dough contains too much sugar | Increase oil temperature; check recipe proportions |
| Doughnuts crack during frying | Oil too hot; dough surface dried out during proofing | Lower oil temperature; cover dough properly during proofing |
| Doughnut holes not round | Inadequate shaping; dough too soft | Roll dough scraps into balls by hand instead of cutting; chill dough briefly if too soft |
I once had a batch of doughnuts that kept collapsing after frying, and I was ready to give up until I realized my kitchen was unusually warm that day, causing the dough to overproof. Reducing the second rise time solved the problem completely.
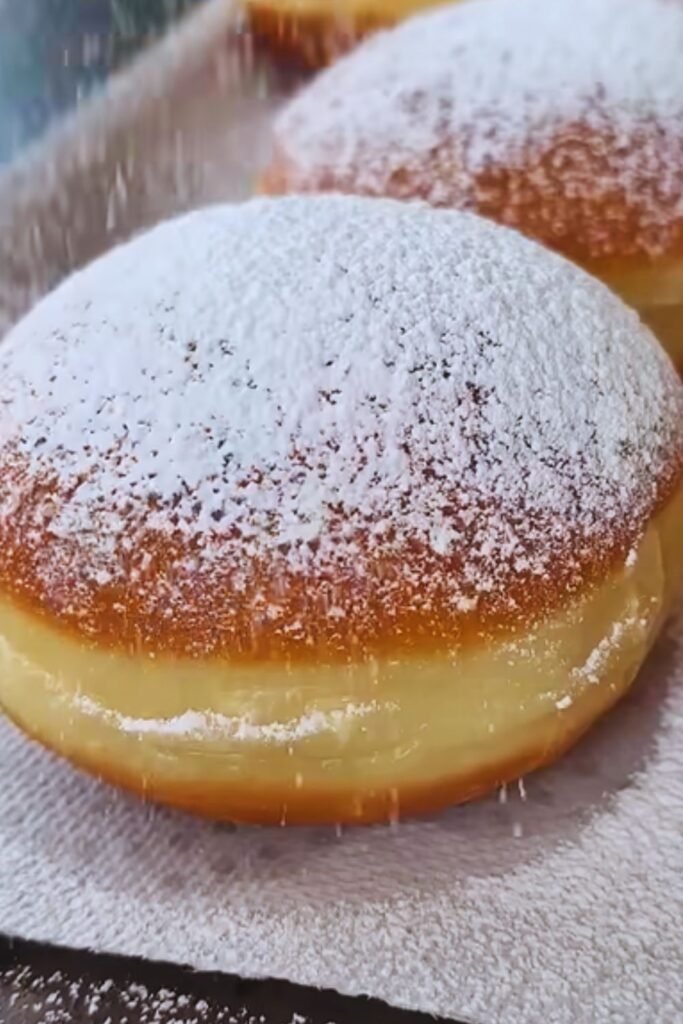
Creative Glazes and Toppings
While a classic vanilla glaze is delicious, don’t be afraid to experiment with different flavors. Here are some of my favorite variations:
Maple Glaze
- 3 cups powdered sugar
- ¼ cup pure maple syrup
- 2-3 tablespoons milk
- Pinch of salt
Chocolate Glaze
- 2 cups powdered sugar
- ⅓ cup cocoa powder
- ⅓ cup milk
- 2 tablespoons unsalted butter, melted
- 1 teaspoon vanilla extract
Cinnamon Sugar Coating
- 1 cup granulated sugar
- 2 tablespoons ground cinnamon
- (Toss warm doughnuts directly in this mixture instead of glazing)
Lemon Glaze
- 2 cups powdered sugar
- 3 tablespoons fresh lemon juice
- 1 tablespoon lemon zest
- 1-2 tablespoons milk (if needed for consistency)
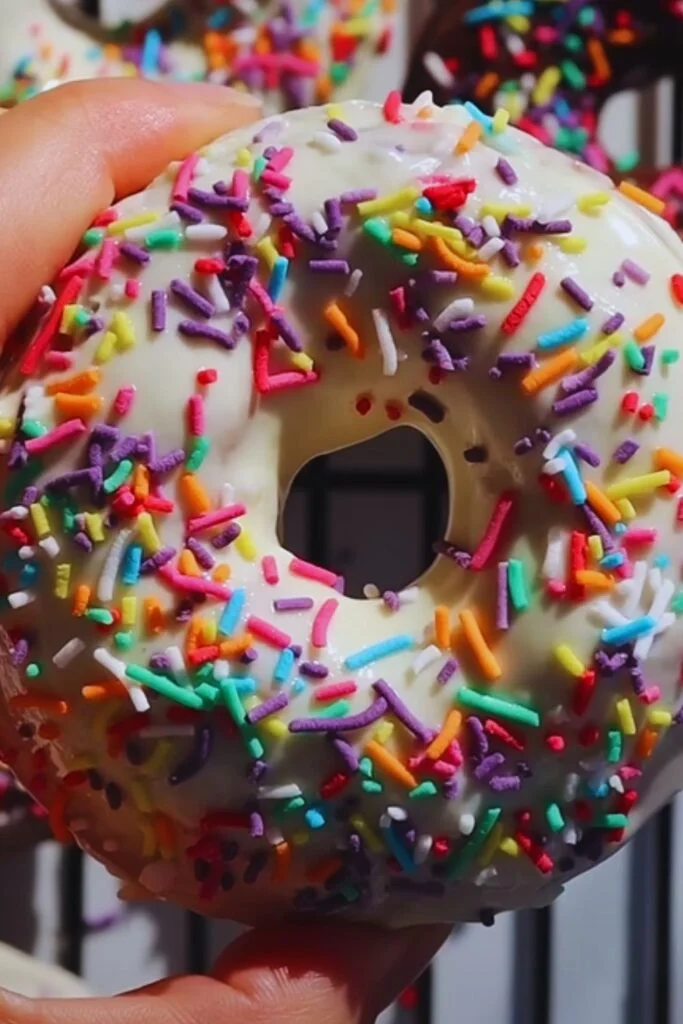
For toppings, consider:
- Toasted chopped nuts
- Colorful sprinkles
- Shredded coconut
- Crushed cookies
- Freeze-dried fruit powder
The key to successful glazing is timing – doughnuts should be warm but not hot when glazed. I find that 3-5 minutes of cooling time works perfectly.
Making Ahead and Storage Tips
Fresh doughnuts are always best, but there are ways to prep ahead and store them properly:
Make-Ahead Options:
- Refrigerate the dough: After the first rise, punch down the dough, cover tightly, and refrigerate for up to 12 hours. Let it come to room temperature for 30 minutes before rolling and cutting.
- Freeze cut doughnuts: After cutting (before the second rise), place doughnuts on a parchment-lined tray, freeze until solid, then transfer to freezer bags. Thaw overnight in the refrigerator, then let rise at room temperature until puffy before frying.
- Pre-mix dry ingredients: Combine flour, sugar, and salt ahead of time and store in an airtight container.
Storage Solutions:
| Storage Method | Maximum Freshness | Best Practices | Reheating Method |
|---|---|---|---|
| Room temperature | 1-2 days | Store in airtight container; avoid refrigeration as it accelerates staling | 10 seconds in microwave or 3-5 minutes in 300°F oven |
| Freezer (unglazed) | 1-2 months | Freeze in single layer, then transfer to freezer bags | Thaw at room temperature, then reheat in 350°F oven for 5 minutes |
| Freezer (glazed) | 2-3 weeks | Flash-freeze individually, then wrap each doughnut in plastic wrap before placing in freezer bags | Thaw at room temperature for 1-2 hours |
I’ve found that unglazed doughnuts freeze remarkably well. When guests are coming, I’ll often fry a double batch, freeze half unglazed, and then quickly reheat and glaze them just before serving. Everyone thinks they’re freshly made!
Health-Conscious Alternatives
While traditional fried doughnuts are a treat, there are ways to make them slightly healthier:
- Baked option: After the second rise, bake doughnuts at 375°F (190°C) for 8-10 minutes. The texture will be different but still delicious.
- Air fryer method: Brush doughnuts with a little melted butter and air fry at 350°F (175°C) for 4-5 minutes. You’ll get a similar crisp exterior with significantly less oil.
- Whole wheat variation: Replace up to 50% of the bread flour with whole wheat flour for added fiber and nutrition. You may need to increase the milk slightly as whole wheat flour absorbs more liquid.
- Reduced sugar options: Cut sugar in the dough by up to 25% without significantly affecting the texture. For glazes, try using honey or maple syrup instead of all powdered sugar.
While I occasionally make these healthier versions, I believe that traditional doughnuts are best enjoyed as an occasional treat in their authentic, indulgent form. Sometimes nothing but the real thing will satisfy that doughnut craving!
Serving Suggestions
A fresh doughnut is delightful on its own, but here are some serving ideas to elevate your doughnut experience:
- Pair with a strong cup of coffee or espresso for the perfect balance of sweet and bitter
- Serve warm doughnut holes with chocolate dipping sauce for a fun dessert
- Create a doughnut sundae by topping a warm doughnut with a scoop of vanilla ice cream and a drizzle of caramel sauce
- Set up a doughnut bar for brunch with various glazes and toppings so guests can customize their own
- Serve with fresh fruit compote on the side to cut through the richness
- For a special breakfast, arrange on a platter with fresh berries and a dusting of powdered sugar
I love serving a platter of freshly glazed doughnuts at weekend brunches. They’re always the first thing to disappear from the table!
Frequently Asked Questions
Q: Why didn’t my doughnuts rise properly? A: There could be several reasons: your yeast might not be active (always test it first), the room might be too cold for proper rising, or you might have added too much flour, making the dough too dense. Make sure your ingredients are at room temperature and your kitchen is warm enough (about 75°F/24°C).
Q: Can I use a different type of flour? A: Bread flour is ideal for its higher protein content, which gives doughnuts their characteristic chew. All-purpose flour will work but produces a slightly softer doughnut. Avoid cake flour or pastry flour as they have too little protein to create the right texture.
Q: Why are my doughnuts absorbing too much oil? A: This usually happens when the oil temperature is too low. Use a reliable thermometer and maintain 350°F (175°C). Also, make sure the dough isn’t overproofed, as this can cause excessive oil absorption.
Q: Can I make these without a stand mixer? A: Yes! You can mix and knead by hand, but be prepared for a workout. The dough will be sticky at first, so resist the urge to add too much flour. Knead for about 10-12 minutes by hand until the dough becomes smooth and elastic.
Q: How do I know when the doughnuts are fully cooked inside? A: A properly fried doughnut should be golden brown on the outside and have an internal temperature of about 185-190°F (85-88°C). If you don’t have a thermometer, break open a test doughnut – it should be light and fluffy inside, not doughy or raw.
Q: My glaze is too thick/thin. How do I fix it? A: For a thinner glaze, add milk a teaspoon at a time. For a thicker glaze, add more powdered sugar. The perfect glaze should coat the back of a spoon and drip off slowly.
Q: Can I fill these doughnuts with jam or custard? A: Absolutely! Instead of cutting out the centers, leave the doughnuts whole. After frying and cooling slightly, use a piping bag with a long, narrow tip to inject filling into the sides of the doughnuts.
Q: Why did my doughnuts deflate after frying? A: This typically happens when doughnuts are overproofed before frying. The yeast exhausts its food supply, and the delicate structure collapses in the hot oil. Be careful not to let them rise too long, especially on warm days.
Final Tips for Doughnut Success
After years of making doughnuts at home, I’ve gathered these essential tips that have transformed my doughnut game:
- Be patient: Good doughnuts can’t be rushed. The proper proofing time develops flavor and texture.
- Respect the dough temperature: Cold dough won’t rise properly; too-warm dough can be sticky and difficult to handle. Aim for about 75°F (24°C) for optimal results.
- Don’t crowd the fryer: Fry only 2-3 doughnuts at a time to maintain oil temperature and give them room to float and expand.
- Use the windowpane test: To check if your dough is properly kneaded, stretch a small piece – it should stretch thin enough to see light through it without tearing.
- Watch carefully while frying: Doughnuts can go from perfectly golden to burnt in seconds. Stay attentive during the entire frying process.
- Consider humidity: On very humid days, you might need slightly more flour; on dry days, you might need more liquid.
- Trust your instincts: As you gain experience, you’ll develop a feel for when the dough looks and feels right, regardless of what the recipe says.
I remember my first successful batch of doughnuts – after several disappointing attempts, I finally achieved that perfect combination of crisp exterior and fluffy interior. The look on my family’s faces as they bit into those warm, fresh doughnuts made all the practice worthwhile. Now, homemade doughnuts are a beloved tradition in our home.
With patience, practice, and these detailed guidelines, you too can create bakery-quality yeast doughnuts that will impress everyone lucky enough to try them. Happy doughnut making!
